Crafts

Nursery Mobiles Part 2

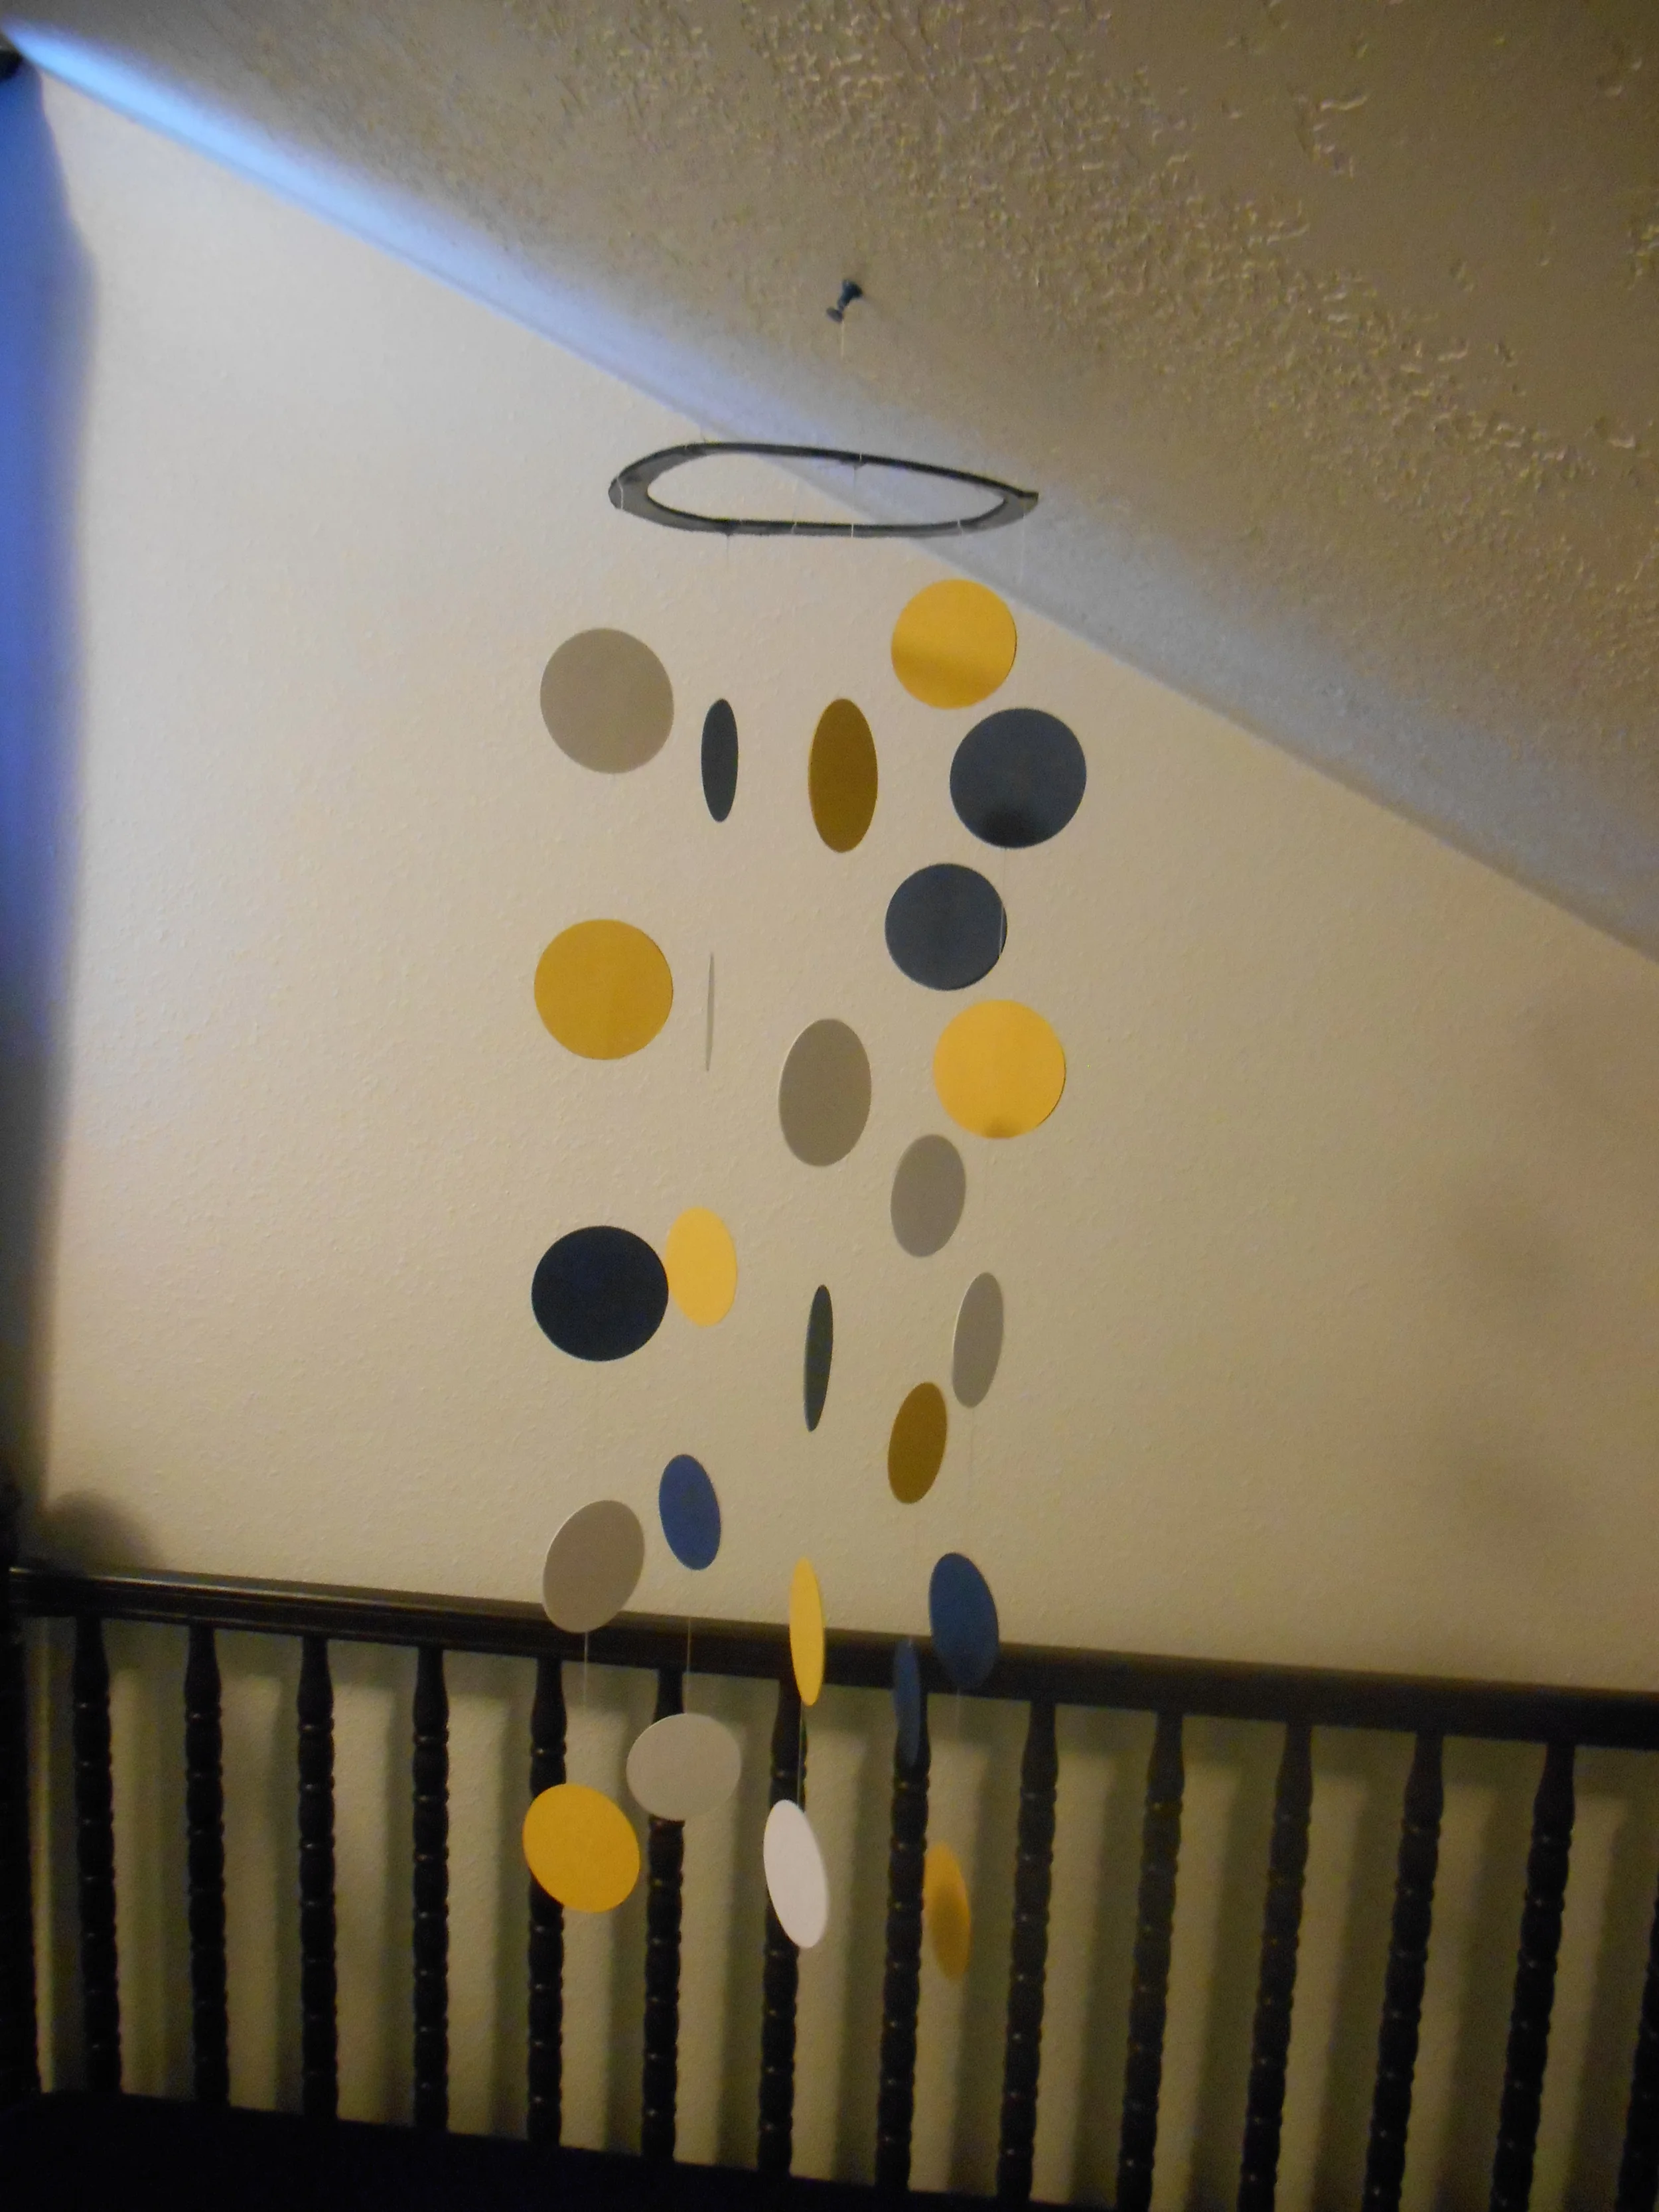
This is a mobile I created to hang over Henry's diaper changing table! Now that the babe is a rolling machine, I wanted to make sure there was something he could look at to distract him so I wasn't constantly worried he would pop right off the table. (of course I still watch him when he is up there, the extra distraction just makes my job a little easier. :) )  Henry LOVES his, and is seriously glued to it almost the entire time I am changing his diaper. 

You will need: 

A sturdy, thin stick/branch from a tree

yarn

cardstock paper, as many colors as you want

a glue gun

scissors

a thumb tack

I started by cutting out my little "leaves." I just winged it on each one and didn't use a template. 

Once I cut them out, I cut out different lengths of yarn for each "leaf." (although they were close in length for the most part) I then hot glued the yarn at the tip of the leaves. (you could probably also use double sided tape and just put two leaves sandwiched together over the yarn. Since I didn't cut my leaves with a template, I didn't want to put forth the effort to make the front and back leaves match each other. :) )  

Once each leaf was glued, I tied them to the stick in the places I wanted. I then tied a piece of yarn in the middle-ish where the weight would be evenly distributed so the stick would lay straight when it was hanging. 

Next I used a thumb tack to stick it up in the ceiling above the changing table. Make sure it's high enough so the babe can't reach it. :) Also, keep it far enough away from the wall so it can spin in a circle without hitting it. 

There you go!


Nursery Mobiles Part 1

When we found out we were having Henry, I was so excited to start decorating his nursery. 

I love making crafts, so I was ready to start creating fun things for him to play with and look at in his bedroom, particually mobiles. 

I looked up ideas on Pinterest, and found some ideas that I loved. The only problem is that I'm kind of a cheap skate, and I'm also really impatient. When I get in the mood to make a craft, I want to do it right then and there, and I don't really want to have to run to the store. Because of this, I try to come up with my own substitions for  the craft items needed with whatever I have at home. Sometimes this works out terribly, but sometimes it's awesome. I personally think that Henry's nursery mobiles fall into the awesome category. :) They look cute, plus I made them with things literally lying around the house and didn't have to spend any extra money. Henry also loves them! Literally, when he is in his crib or on his diaper changing table (I'll show you that mobile in part 2) he can't look away. I was nervous that he wouldn't be able to sleep because of the one above his crib, but it seems to be the perfect thing to lull him to sleep. 

Here's the first one that I made to hang over his crib.

You will need: 

Paper, as many colors as you want

Sewing thread 

2 large sized Paper plates 

one thumb tack

glue

double sided tape

paint

To start, I grabbed 2 paper plates and cut around their bases where it was a full circle.

picture taken from www.papercraftsforchildren.com 

picture taken from www.papercraftsforchildren.com 

Then, using the circle you just cut out,  cut out the insides and make  2 'half inch' sized donut type circles. The one in the picture below is a little thicker than I did. 

picture taken from amazon.com

picture taken from amazon.com

Then  glue each donut circle together, and paint them whatever color fits into your theme. 

It doesn't look perfect, but seriously the only person who really sees it is a baby.. so i wasn't too concerned on making sure it was flawless. :)  

It doesn't look perfect, but seriously the only person who really sees it is a baby.. so i wasn't too concerned on making sure it was flawless. :)  

Next, I cut out the circles with the help of my wonderful sister in law's Cricut. 

I cut the thread into five different pieces at around 2 feet long, and then laid the circles where I wanted them. Next I grabbed a second circle of the same color and used double sided tape to stick them together with the thread in the middle. The tape was able to hold the thread in place as well as keep the "back" of the circle attached to the "front."  

Next, I tied each piece of thread to the painted plates. In order to hang it, I added thread in three places and joined them all together. I had to put it in 3 places so it wouldn't be tilted!

Then tie the hanging thread to the thumb tack and stick it into the ceiling where you want to hang it. I wasn't sure it would stay there very well, but it has literally not budged since I put it the ceiling 9 months ago. 

You may have to adjust how long your threads with the circles are. I cut them shorter so that the baby wouldn't be able to reach them. 

Ta da! 

Dont' you fret, that pillow is never in his crib while he is actually sleeping. :) 

Dont' you fret, that pillow is never in his crib while he is actually sleeping. :)